E-mail: sale@obdtools.net
> Auto Key Programmer > LAUNCH TS971 TPMS Bluetooth Tire Pressure Monitoring Sensor Tester Service Tool 433Mhz/315Mhz


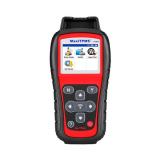
LAUNCH TS971 TPMS Bluetooth Wireless Tire Pressure Monitoring Sensor Tester 433Mhz/315Mhz
LAUNCH TS971 integrates diagnostic functions of a variety of car models, with TPMS trouble light reset, sensor ID, battery status, tire pressure and temperature read, TPMS sensor activation and matching as well. It better meets the needs of auto repair shop, tire assembly line, individual owner and tire repair shop to diagnose, activate and match the TPMS system and the tire pressure sensors.
Launch TS971 TPMS Tool Features:
1.Activate the TPMS sensors of most vehicle brands globally with right protocols;
2.Read tire pressure, temperature sensor ID and battery level; Duplicate or generate the new 3.sensor ID after sensor replacement; Rewrite the sensor position into the ECU after sensor rotation;
4.Help guide and software update subscription; Search by make-mode-year;
5.Tested sensor history query; Read and clear TPMS fault code.Product Specification:
Display screen : 4inch TFT screen, resolution 320*480
OBD supply voltage: 9-18V
USB supply voltage:5V
Battery: Lithium-ion battery, 3100mAh,3.7V
Activate sensor frequency: 125KHz
Receive sensor frequency: 315MHz/433MHz
Working temperature: -10 to 50℃
Storage temperature: -20 to 70℃
Storage humidity: 10%~93%
Dimension:195x86x32mm
Weight :<460g
Drop: It won't be damaged in case of falling from 1 meter high.
Boot time: <5s, time from pressing power button to the main menu
Button response: 1 second
Working hour: A year and a half in power off state;5.5 hours in working condition.Supported Cars:
for Acura , for Alfa Romeo , for Aston Martin , for Audi , for Bentler ,for BMW ,for Bugatti, for Buick, for Cadillac, for Chevrolet , For Chrysler , for Coda , for ,Dodge , for Ferrari , for Fiat , for Fisker, for Ford , for Freightliner , for Genesis , for GMC , for Honda Motorcycle, for Honda , for Hummer , for Hyundai , for Infiniti , for Isuzu , for Jaguar ,for Jeep, for Kia , for Lamborghini , for Land Rover , for Lexus , for Lincoln , for Lotus , for Maserati , for Maybach ,for Mazda, for Mclaren ,for Mercedes, for Mercury , for Mini , for Mitsubishi , for Nissan , for Plymouth , for Pontiac, for Ram , for Rolls Royce , for Saab , for Saturn ,for Scion ,for Smart , for Subaru, for Suzuki , for Tesla , for Toyota ,for Volkswagen , for Volvo , for VPG
Charge and Boot
This TPMS diagnostic tool is equipped with 3100mAh lithium-ion polymer battery. There are 2 charging methods:
1. By the power adaptor
1) Locate the device USB port.
2) Use the power adaptor to connect the device with the power supply.
2. By the USB cable
1) Locate the device USB port.
2) Use the USB cable to connect the device with the computer.
Note: To get a best device performance, please keep the device fully charged. Charge the device at least 2 hours before first use.
3) After charging, press the power button to start the device.
Power supplied by DLC
This TPMS diagnostic tool can be powered by vehicle DLC (Data Link Connector) in addition to the rechargeable battery. Follow the steps to start the device:
1. Connect one end of the diagnostic main cable to the diagnostic interface of the device and tighten the screw.
2. Locate the vehicle DLC position. The DLC is usually a standard 16 pin connector. It is an interactive interface between the diagnostic tool and the onboard computer. In most vehicles, the DLC is installed on the driver side, 12inch under the instrument, please see below picture.
Attentions for Device Usage
1.This device is a precision electronic instrument. Be sure no impact during using.
2.Take the device carefully, to avoid collision.
3.Turn the ignition to OFF position when insert or remove the OBD connector.
4.If the vehicle is not going to be used for a week or more, to ensure that the battery holds its charge well, it is recommended to unplug the connector.
5.In the use of the product, it is not recommended to use communication functions, such as telephone and SMS, which may lead to interruption of program data communication. If this occurs, please operate the related functions again.
3. Insert one end of the diagnostic main cable to the vehicle DLC.
4. Press the power button to start the device and wait for the main menu.Package includes:
1pc x USB cable
1pc x Charger
1pc x Memory card
1pc x OBDII cable
1pc x User Manual
1pc x Magnet
1pc x Suitcase
1pc x Card reader
(Note: The magnet is only used to activate the tire pressure sensors equipped by part old vehicle models. When using, please put the magnet near to the gas nozzle while receiving the signal sent from the sensor with the device.)Launch TS971 TPMS Activation Tool Register and Upgrade
Requirement:
1. Log in http://info.x431.com to download the upgrade tool and install it to the computer.
2. Compatible operation systems: Windows XP, 7, 8 or Windows 10.
This TPMS diagnostic tool supports 2 upgrade methods. Select any one of them to upgrade:
Method 1: Via Memory card (recommended)
1. Start the upgrade tool, screen displays as shown in the below picture:
2. Input the product serial number (can be found in the back of the device).
Note: After inputting the product serial number, "Reset system" function will be activated. This option is for the system reset after the replacement of Memory card.
3. Click [Device Upgrade] to enter the registration page. Input the email address and registration code, then click [OK], see picture 2.
(Refer to Step 4-7 to get the registration code.) (Skip to Step 8 if you already have the registration code.))
4. The registration code can be found in the diagnostic tool. Press power button to start the device.
5. In the main menu, use arrow keys to select 'Help', then click [OK].
6. In picture 3, select "Tool Information" and click [OK] to enter picture 4.
7. The registration code displayed in picture 4 is the one required in
Step 3.
(Back to Step 3 and input the registration code, then continue.)
8. Remove the Memory card from the device and insert it to the included card reader, then insert the card reader to the computer's USB port.
9. Restart the upgrade tool. Select the item to be updated or click"All", then click [Download] to download.
10. After above steps, remove the Memory card from the card reader and insert it back to the device. Press the power button to start the device. It prompts an upgrade dialog box (see Picture 5)
(Note: This dialog box will not appear ifonly latest diagnostic software is available but no firmware package to be downloaded).
Click [OK] to confirm the upgrade.
11. Registration and upgrade steps are complete. The device can be used now
Method 2: Via USB cable
Note: When use this method to upgrade, please ensure the network is normal.
1. Connect one end of the USB cable to the device, the other end to the computer's USB port.
2. If a new version has been found, the screen will display as shown in the Picture 6.
3. Click [OK] button to set the device as USB device, see Picture 7.
(Note: The serial number and registration code displayed in this picture are the ones required in Step 4-6.)
4. Start the upgrade tool, screen displays as shown in the Picture 9.
5. Input the product serial number, click [Device Upgrade] to enter the registration page. Input the email address and registration code, then click [OK] to enter the upgrade page.
6. Select the item to be updated or click "All", then click [Download]to download.
7. After above steps, restart the device. The system will prompt an upgrade dialog box, click [OK] to upgrade.
8. Registration and upgrade steps are complete. The device can be used now.
Contact Information:
Whatsapp: +1 937 888 0032
Live Support: Chat with us online
E-mail: sale@obdtools.net
Skype: jansonsh@hotmail.com
If you have any problem, please do not hesitate to contact us.